Table of Contents
SSH and SCP
This article describes basic usage of SSH and SCP in DD-WRT NXT.
For all instructions on this page, you have to enable SSH first!
Overview
Level of difficulty
Medium
Enabling SSH access
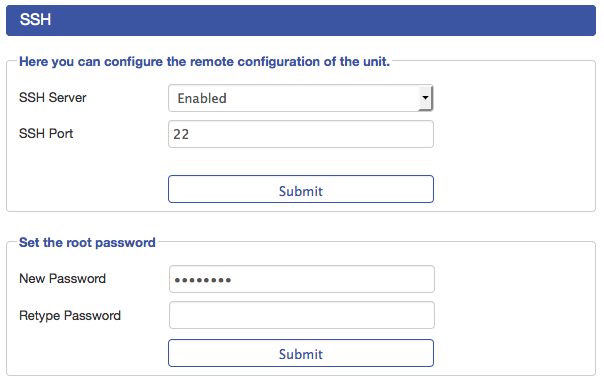
Login the WEB-Interface, then navigate to:
- Network Services
- SSH
Under Remote Configuration:
- set SSH Server to Enabled
- change the SSH Port to your needs (default is 22)
Under “Set the root password”:
- type in your new SSH password at “new Password”
- retype the SSH password at “Retype Password”
hit the Apply all Changes button in the upper right corner
Related topics
Instructions
Connecting using Windows
For using SSH in Microsofts Windows, you have to download Putty or another SSH client application of choice.
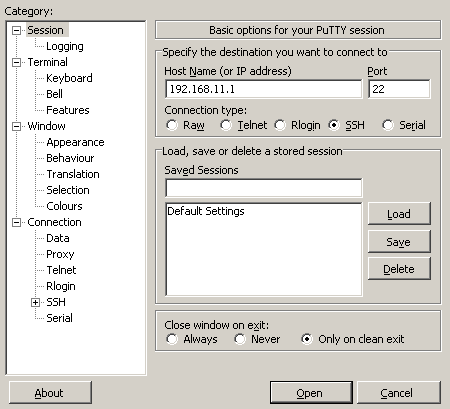
- Enter the IP-Address of your router in the Host Name field
- Select SSH as the Protocol
- Hit Open at the very bottom to connect
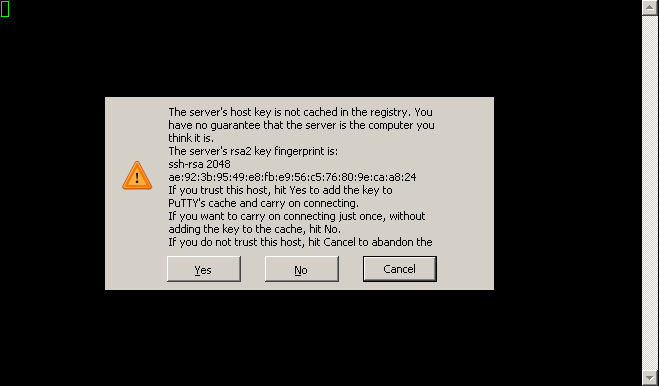
Putty will once ask you to verify the SSH Servers fingerprint, you can answer with either Yes or No.
You will be prompted for login informations.
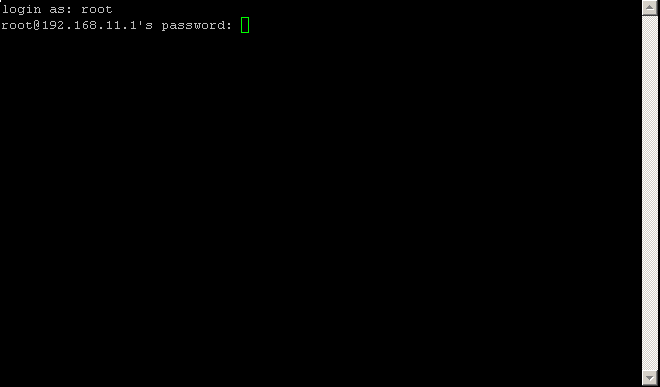
Username will always be 'root'
The password can be specified in the Webinterface (Service>SSH)
Copy using Windows - SCP
For copying a file with Windows to the routers File-System, you have to download and install WinSCP or another tool for transferring files via the SCP protocol.
Starting:
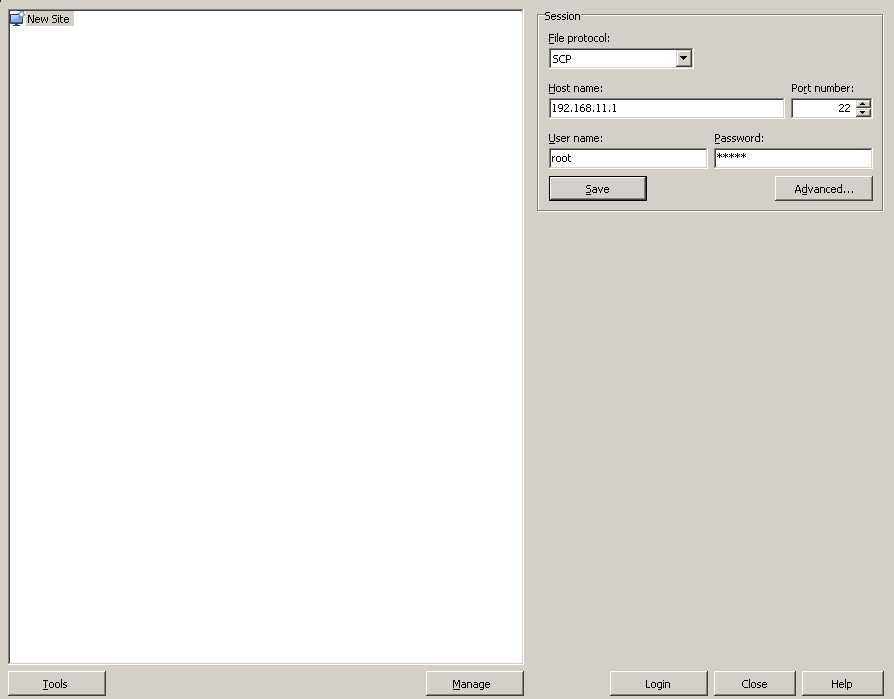
On the right hand session menu, select SCP as File protocol,
enter the IP-Address of the router (192.168.11.1 is default)
User name is always 'root'
The password can be specified in the Webinterface (Service>SSH)
Hit the login button at the very bottom
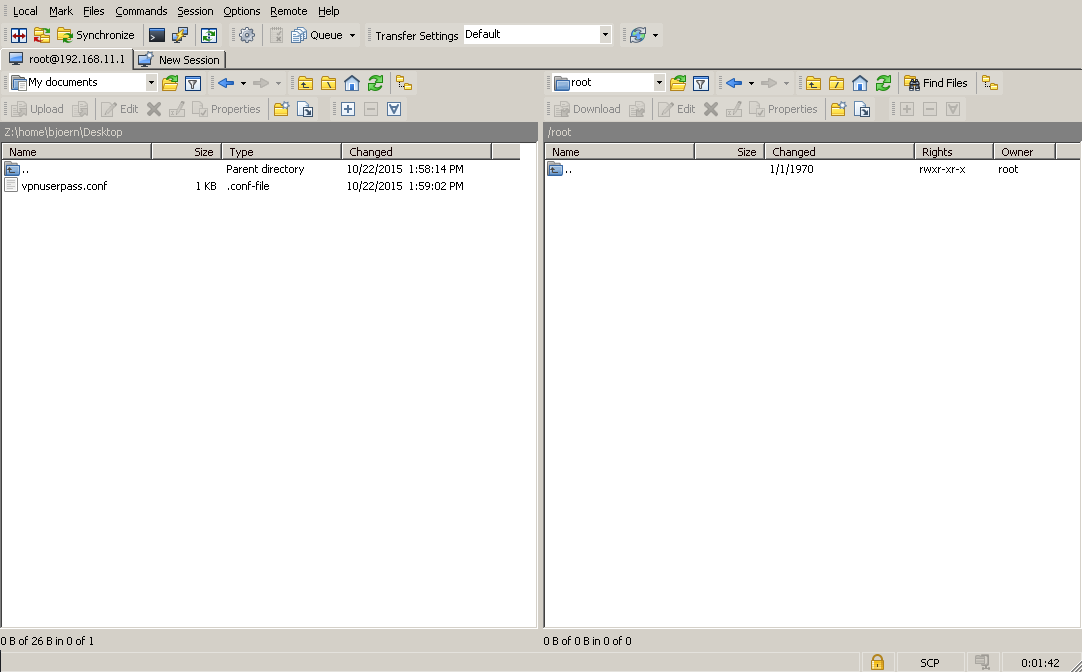
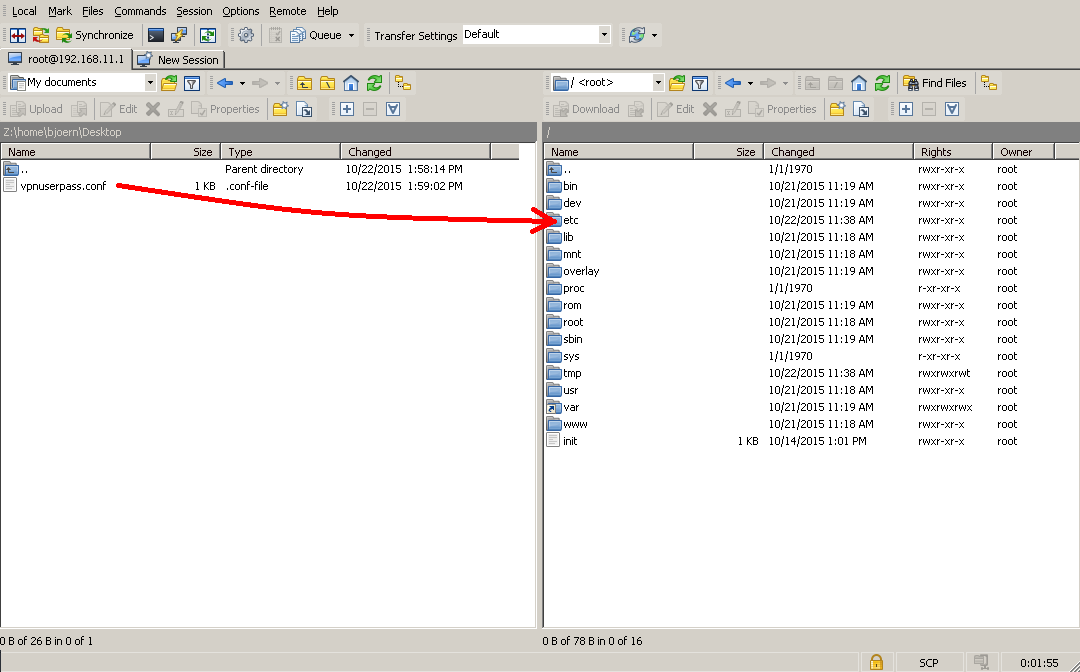
by double clicking the right hand side “..” file in the view, you'll be presented with the top level directory structure “/”
Then you can drag & drop files directly to the routers File-System
Connecting using Linux
- Install the OpenSSH package using your distributions package management system
#~ ssh root@192.168.11.1
Warning: Permanently added '192.168.11.1' (RSA) to the list of known hosts.
root@192.168.11.1's password:


BusyBox v1.23.2 (2015-10-16 10:56:34 CEST) built-in shell (ash)

 ____  ____     _ _ _ _____ _____    _____ __ __ _____
|    \|    \ __| | | | __  |_   _|  |   | |  |  |_   _|
|  |  |  |  |__| | | |    -| | |    | | | |>   <  | |
|____/|____/   |_____|__|__| |_|    |_|___|__|__| |_|

 ----------------------------------------------------

root@dd-wrt-nxt:~#
Copy using Linux SCP
Where “vpnuserpass.conf” is a file, in the current working directory,
“root@192.168.11.1” are the connection informations
“:/etc” is the place on the remote system (the router)
#~ scp vpnuserpass.conf root@192.168.11.1:/etc
the resulting file on the router will be placed as: /etc/vpnuserpass.conf
Connecting using MacOS
Apples MacOS comes with build in SSH Support.
Search for “Terminal” using Spotlight or browsing the Applications menu.
#~ ssh root@192.168.11.1
Warning: Permanently added '192.168.11.1' (RSA) to the list of known hosts.
root@192.168.11.1's password:


BusyBox v1.23.2 (2015-10-16 10:56:34 CEST) built-in shell (ash)

 ____  ____     _ _ _ _____ _____    _____ __ __ _____
|    \|    \ __| | | | __  |_   _|  |   | |  |  |_   _|
|  |  |  |  |__| | | |    -| | |    | | | |>   <  | |
|____/|____/   |_____|__|__| |_|    |_|___|__|__| |_|

 ----------------------------------------------------

root@dd-wrt-nxt:~#
Copy using MacOS SCP
Where “vpnuserpass.conf” is a file, in the current working directory,
“root@192.168.11.1” are the connection informations
“:/etc” is the place on the remote system (the router)
#~ scp vpnuserpass.conf root@192.168.11.1:/etc
the resulting file on the router will be placed as: /etc/vpnuserpass.conf
UCI Config System
- Enable SSH
uci show dropbear
- Store changes
uci commit dropbear
- Apply changes
/etc/init.d/dropbear restart
UCI config files (native)
Troubleshooting
Not available, yet
