Table of Contents
Windows File Sharing
This page will discuss the GUI Configuration of Windows File Sharing (Samba).
Overview
Level of difficulty
Easy
Related topics
Instructions
GUI
In this tutorial we will configure Windows File Sharing.
At first open your browser and go to your router's configurations website (default: 192.168.11.1). Log in to the router with your password.
Go to the Network Services tab and then to Windows File Sharing.
Here you can see 3 options. The first option is for the name which is shown in your network for the other devices. The next option is for the workgroup name, which must be equal with the clients. Last option is for description.
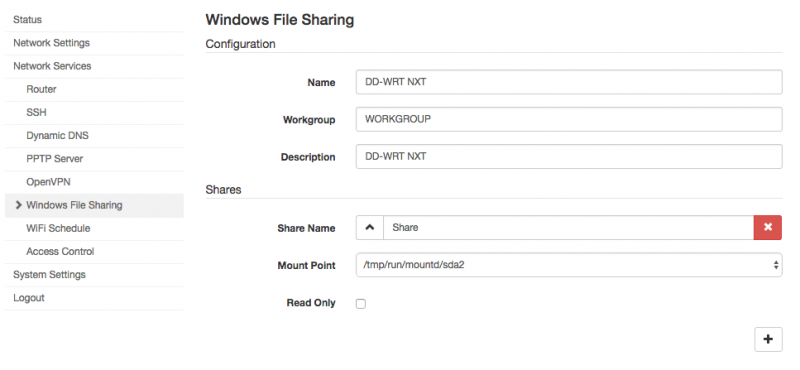
With the [+] button you can create new shares. Give it a name and select your connected USB device. Down here you can also set read only mode.
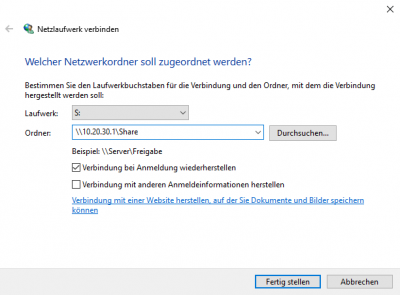
After saving your settings go to your client for this example a windows machine and add a network storage (found unter explorer –> right click on “My PC” –> add network storage).
In the new window you must enter \\*ip address of the router*\*share name*. Don't forget to set a drive letter.
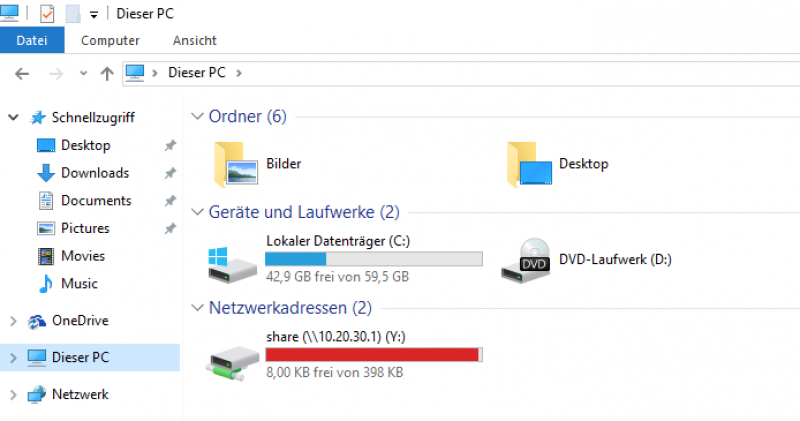
As you add your share it should appear in the explorer.
It will be look like this:
Default configuration
config samba
	option workgroup 'WORKGROUP'
	option homes '1'
	option name 'DD-WRT NXT'
	option description 'DD-WRT NXT'
| Name | Type | Required | Default | Description |
|---|---|---|---|---|
name | string | no | DD-WRT NXT | Name of the Server |
workgroup | string | no | workgroup | Name of the Workgroup |
description | string | no | DD-WRT NXT | Description of the Server |
charset | string | no | UTF-8 | Display charset & unix charset |
homes | boolean | no | 0 | Share the user directory |
interface | string | no | loopback lan | Interfaces samba should listen on. Syntax: “<uci-interface-name> <uci-interface-name> …”. Note, that it is not of type list. |
